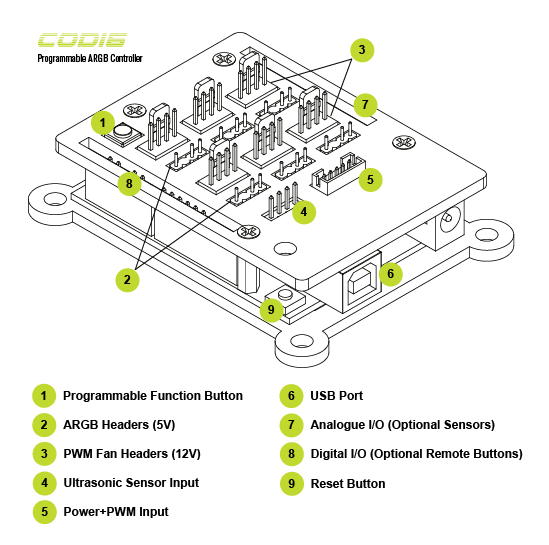
CODI6 (FC-CODI6-A)
6-Channel Programmable ARGB Controller Kit
Full Control. Easy Programming. Countless RGB Effects
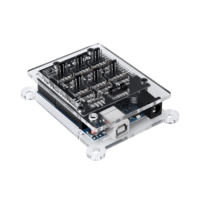
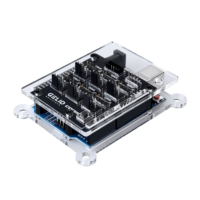
CODI6 comes with freedom in heart. It includes the Arduino UNO compatible USB controller board and add-on modules for 6 independently programmable ARGB channels (5V) and 6 PWM Fan channels (12V) on top. With 4A per-channel current output, up to 6 ARGB fans or ARGB strips are supported. The RGB controls are loaded via open-source Arduino IDE software and can be easily programmed by various multi-function code samples available from open-source online repositories, or by your own fully custom code to implement any possible, virtually unlimited RGB effects.
CODI6 also provides on-board function button for quick mode switching and supports optional ultrasonic sensor for remote control. Additionally, 4 magnetic stands and a sticky gel pad are all included too, so you can mount CODI6 anywhere inside your PC.
Feel the rhythm of stunningly vivid RGB lighting. Take the full control of your ARGB fans and ARGB strips!
Open Source USB Controller Board. Full-fledged and fully customizable programming to create countless RGB modes, dynamic effects and functions. Tons of open-source code samples available online. Very little programming skills required for a start.
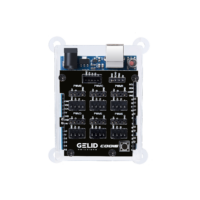
6 ARGB Headers and 6 PWM Headers. Up to 6 addressable RGB fans or strips are supported for independently programmed RGB effects.
4A Per-Channel Current Output. Up to 90 LEDs per channel are supported.
Channel Sync. Option to syncing all 6 ARGB channels regardless of type, model and LED count of the connected ARGB devices.
Shared PWM Control. PWM Fan channels share PWM input from motherboard.
On-board Programmable Function Button. Quick mode switching.
Optional Remote Buttons. Up to 5 remote buttons can also be connected and programmed.
Arduino Sensor Ecosystem Support. Analogue inputs/outputs for various sensors to implement enhanced event-driven remote RGB controls: ultrasonic sensor, sound level sensor, IR sensor, vibration sensor, temperature sensor, motion sensor, and many others.
4 Magnetic Stands and Sticky Gel Pad. Easy mounting inside PC chassis.
Please download documentation:
CODI6: FAQ
CODI6: Quick Start Guide
EAN: 4897025782082
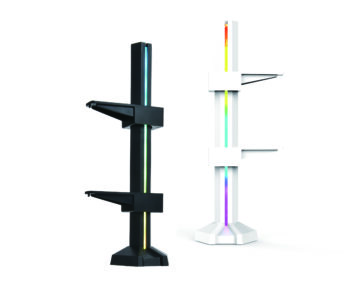
CODI6 is a programmable controller for Adressable RGB (ARGB) strips, fans and other devices. It is based on open source Arduino UNO compatible board and provides 6 independently programmable ARGB channels to connect and control your RGB devices. Gelid Solutions RADIANT-D Fan is a perfect mate for CODI6.
CODI6 is programmable via Arduino software, such as Arduino IDE, Code Blender, B4R, and others. Please refer to Quick Start Guide for more details.
- Which LED library do I need for programing?
FastLED or Adafruit_NeoPixel.
Please declare this in your code:
#include <FastLED.h>
or
#include <Adafruit_NeoPixel.h>
- What parameters do I define for RADIANT-D fans?
Using FastLED and 3 fans, please define:
#define NUM_STRIPS 3 //number of fans
#define NUM_LEDS_PER_STRIP 9 //number of LEDs per fan
#define NUM_LEDS NUM_LEDS_PER_STRIP * NUM_STRIPS //total number of LEDs
In void setup() section, please configure your LED array as the following:
FastLED.addLeds<NEOPIXEL, 3>(leds, 0, NUM_LEDS_PER_STRIP);
FastLED.addLeds<NEOPIXEL, 5>(leds, NUM_LEDS_PER_STRIP, NUM_LEDS_PER_STRIP);
FastLED.addLeds<NEOPIXEL, 6>(leds, NUM_LEDS_PER_STRIP*2, NUM_LEDS_PER_STRIP);
You can replace NEOPIXEL with WS2811 also. Please refer to:
https://github.com/FastLED/FastLED/wiki/Basic-usage
https://github.com/FastLED/FastLED/wiki/Multiple-Controller-Examples
- What parameters do I define for different device type installs?
For example, using a 6LED device, a 9LED fan and a 30LED strip, please define:
#define NUM_LEDS_DEV 6 //6LED device, number of LEDs
#define NUM_LEDS_FAN 9 //9LED fan, number of LEDs
#define NUM_LEDS_STRIP 30 //30LED strip, number of LEDs
#define NUM_LEDS NUM_LEDS_DEV + NUM_LEDS_FAN + NUM_LEDS_STRIP //total number of LEDs
In void setup() section, please configure your LED array as the following:
FastLED.addLeds<NEOPIXEL, 3>(leds, 0, NUM_LEDS_DEV);
FastLED.addLeds<NEOPIXEL, 5>(leds, NUM_LEDS_DEV, NUM_LEDS_FAN);
FastLED.addLeds<NEOPIXEL, 6>(leds, NUM_LEDS_DEV+NUM_LEDS_FAN, NUM_LEDS_STRIP);
- How do I tell what pin assignment is used for ARGB headers?
ARGB headers are labeled as PWM3, PWM5, PWM6, PWM9, PWM10 and PWM11. The numbers correspond to the standard Arduino pin assignment for PWM outputs.
For example, if you connect your RGB device to the PWM3 ARGB header it is assigned to the Digital I/O pin 3. And using FastLED, you have to point your RGB device to this pin with FastLED.addLeds<NEOPIXEL, 3> in LED array configuration.
- How do I program LEDs in sequential order?
You can create a matrix to control LEDs in sequential order.
For example:
int db[] = {5,6,4,7,3,8,2,1,0};
And then replace all leds[i] by leds[db[i]] inside the main loop.
- Where do I find documentation for FastLED, NeoPixel and NewPing libraries?
FastLED:
https://github.com/FastLED/FastLED/wiki
NeoPixel:
https://adafruit.github.io/Adafruit_NeoPixel/html/class_adafruit___neo_pixel.html
NewPing:
https://bitbucket.org/teckel12/arduino-new-ping/wiki/Home
1. Download and install CH340 USB driver.
2. Download and install Arduino IDE.
3. Connect the supplied USB cable to USB Port on CODI6 as shown. Connect the opposite end of the cable to a free USB header on your motherboard.
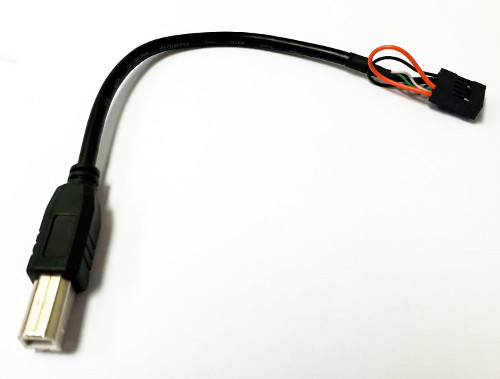
USB Cable
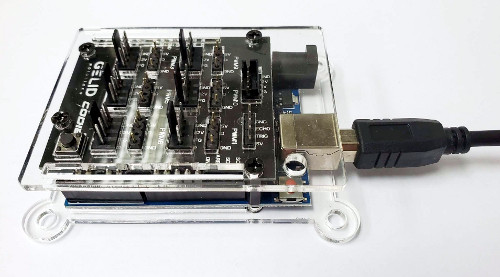
USB Cable Connection
4. Connect the 5Pin Power connector of the supplied Power SATA+PWM cable to Power+PWM Input on CODI6. Connect the SATA Power connector on the opposite end of the cable to your PSU SATA cable and the 4Pin PWM connector to your motherboard's PWM Fan header that you want to control via BIOS or fan control software.
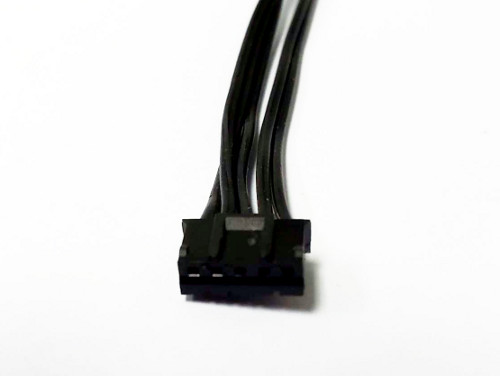
5Pin Power Connector
Power SATA+PWM Cable Connection
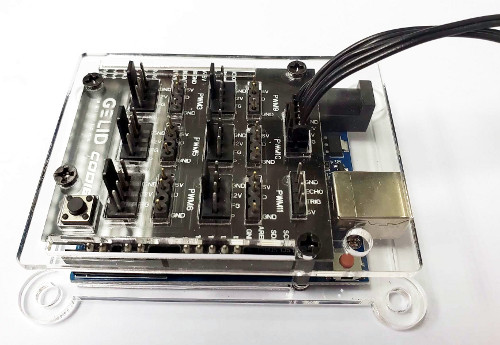
5. Connect the ARGB connector of your ARGB fan to one of the ARGB Headers on CODI6. Locate the arrow mark on the connector and make sure it points to the 5V pin of the header.
Please note: RGB lights will be off until your RGB control code is uploaded to CODI6.
ARGB Cable Connection
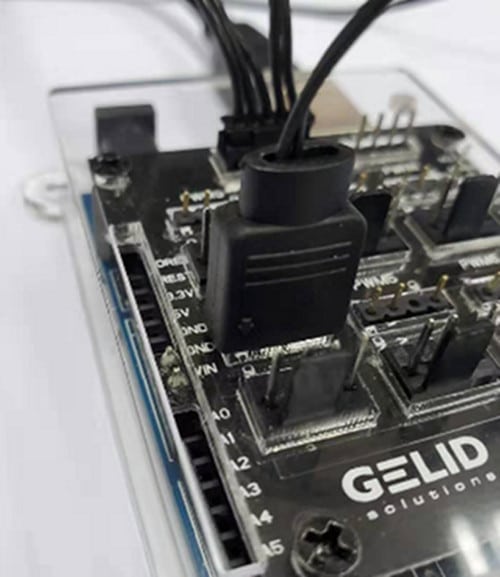
6. Connect the PWM connector of your fan to the PWM Fan Header next to the ARGB Header as shown.
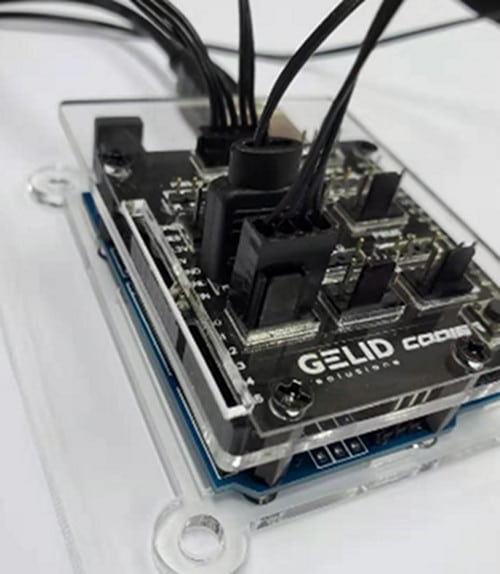
PWM Cable Connection
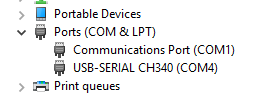
7. Check Windows Device Manager whether USB-SERIAL CH340 is present, note its COM number.
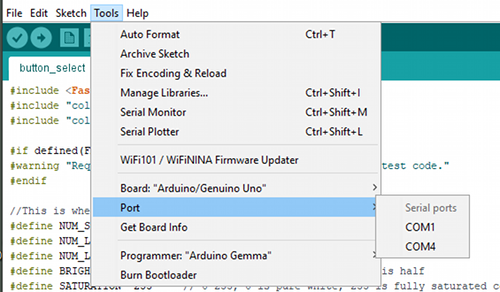
8. Open Arduino IDE, under Tools Tab, set board to Arduino/Genuino Uno and set Port according to step 5.
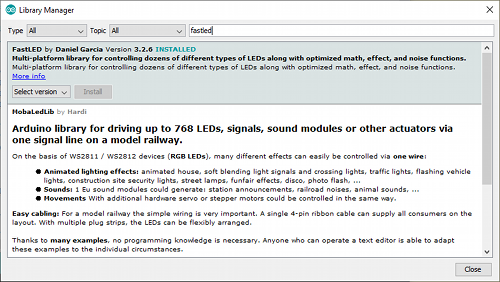
9. Under Sketch Tab -> Include Library -> Manage Libraries, install FastLED library.
10. Copy and paste a sample code into Arduino IDE. Or simply click on the file to start Arduino IDE and load the sample code automatically.
11. Modify the code if needed.
12. Upload it and enjoy.
Window XP, 32/64bit Windows Vista/7/8/8.1/10:
CH341SER.EXE
Mac OSX Mavericks (10.9), Yosemite (10.10), El Capitan (10.11) and Sierra (10.12):
CH341SER_MAC.ZIP
Alternative driver:
https://github.com/adrianmihalko/ch340g-ch34g-ch34x-mac-os-x-driver
Linux:
CH341SER_LINUX.ZIP
Please upgrade your Linux software to get the latest built-in drivers. Otherwise use the supplied package to compile and install the driver.
Multi-Purpose Code Samples:
Animation: blend between 2 animations
MetroStar: nice RGB effects
Clock: rotating colors
TrafficLights: multi-channel color switching
ButtonSelect: programmable function button
Ultrasonic: ultrasonic sensor controls
MusicReactive: sound level sensor controls
Radiant-D Code Samples:
DroppingRainbow: dynamic rainbow effect
DroppingStars: dynamic multi-channel RGB effect
MeteorShower: dynamic multi-channel RGB effect
RisingRainbow: dynamic rainbow effect
ButtonSelect: programmable function button
TrafficLights: multi-channel color switching
Ultrasonic: ultrasonic sensor controls
STELLA Code Samples:
DroppingRainbow: dynamic rainbow effect
DroppingStars: dynamic multi-channel RGB effect
MeteorShower: dynamic multi-channel RGB effect
RisingRainbow: dynamic rainbow effect
ButtonSelect: programmable function button
TrafficLights: multi-channel color switching
Ultrasonic: ultrasonic sensor controls
S3MKi - Распаковка и обзор, August 2019
https://youtu.be/6xS7XdaLYFk
ArtomU, July 2019
https://youtu.be/jBITwPFV1pY
ZeDenTV, July 2019
https://youtu.be/jFQtymkkEzo
ZeDenTV, July 2019
https://youtu.be/FuouVEDvXh4
Pashtet495, July 2019
https://youtu.be/q7BHJmFj8Uk